Weaving loom
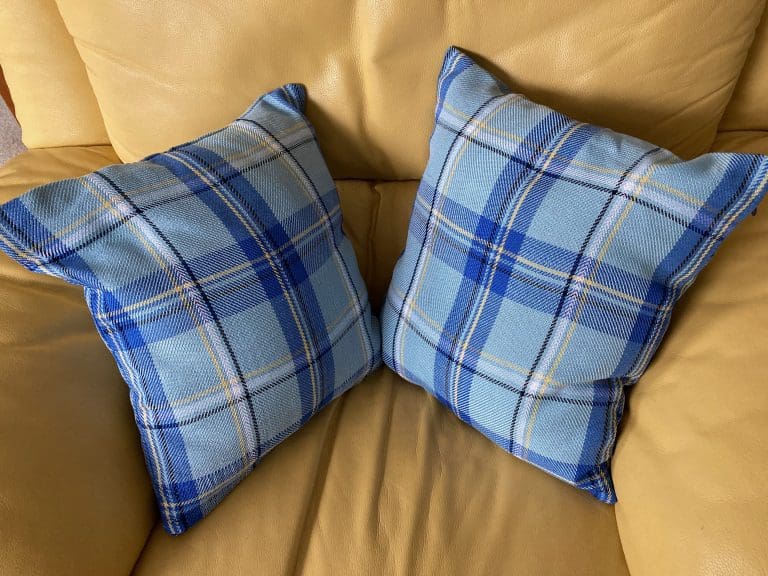
I’ve got my weaving loom out again. In 2017, I bought an 8 shaft table loom from Ashfords and for a couple of years got stuck into learning to weave and weaving. I worked out how to make my own patterns and made a few very nice things. So far, I only weave in cotton. The one I liked best was a pattern I made from a photo of a cushion cover. I made a set of cushion covers based on that design. Photo below – Llanddwyn. I then got stuck into my biggest project – a 2m long by 80cm wide strip to go along the back of a couch – also from a pic of a cushion cover – Snowdonia. This weaving was difficult, mainly because the 80cm distance the shuttle had to cover was too far for me. I had to push the shuttle across and through the shed a few centimetres at a time. It took a long time and I gave up. The loom was moved under my desk and sat there for a couple of years. With COVID lockdows, I was wanting something to do and the loom came out and I finished that strip of Snowdonia.
I bought the loom from Ashfords, a NZ company with an outlet in Australia. I bought from them because that have three very good youtube videos showing how to do steps 5, 6 & 7 below. Why did I want to get started? It sort of began during a visit to a French museum that had a Jacquard Loom on display with the whole process driven by punch cards that let it achieve extremely difficult patterns. That and the realisation that only a few hundred years ago, my ancestors would have made their own clothes on a simple loom.
An easy pointed twill 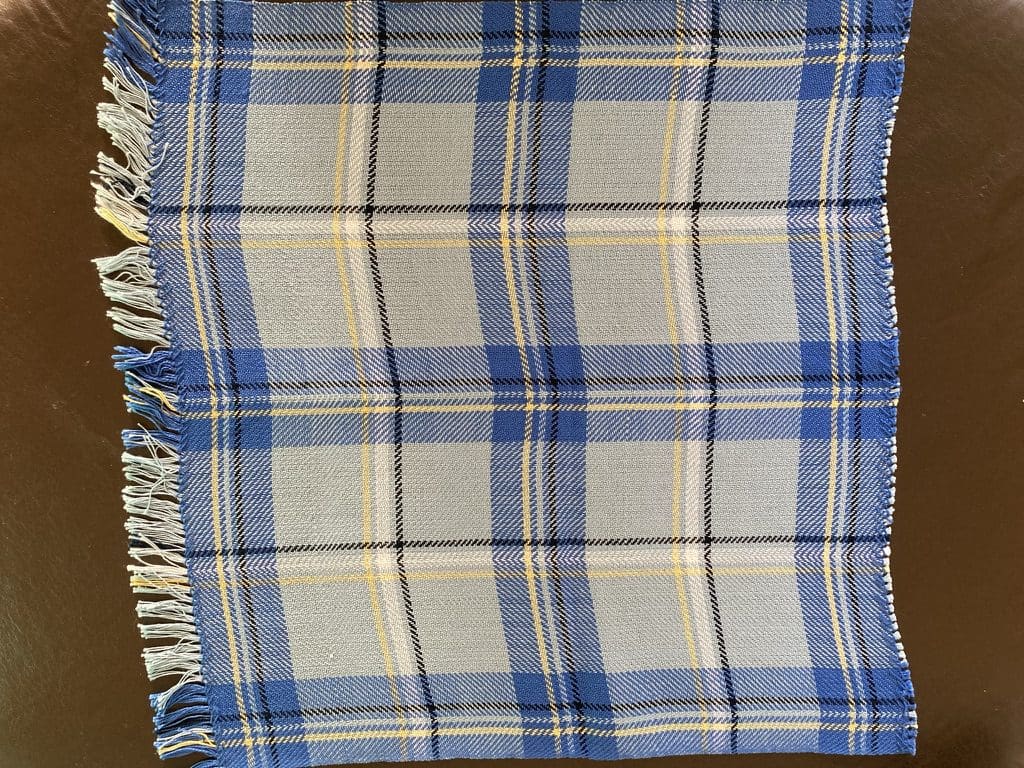
Llanddwyn pattern built from a photo 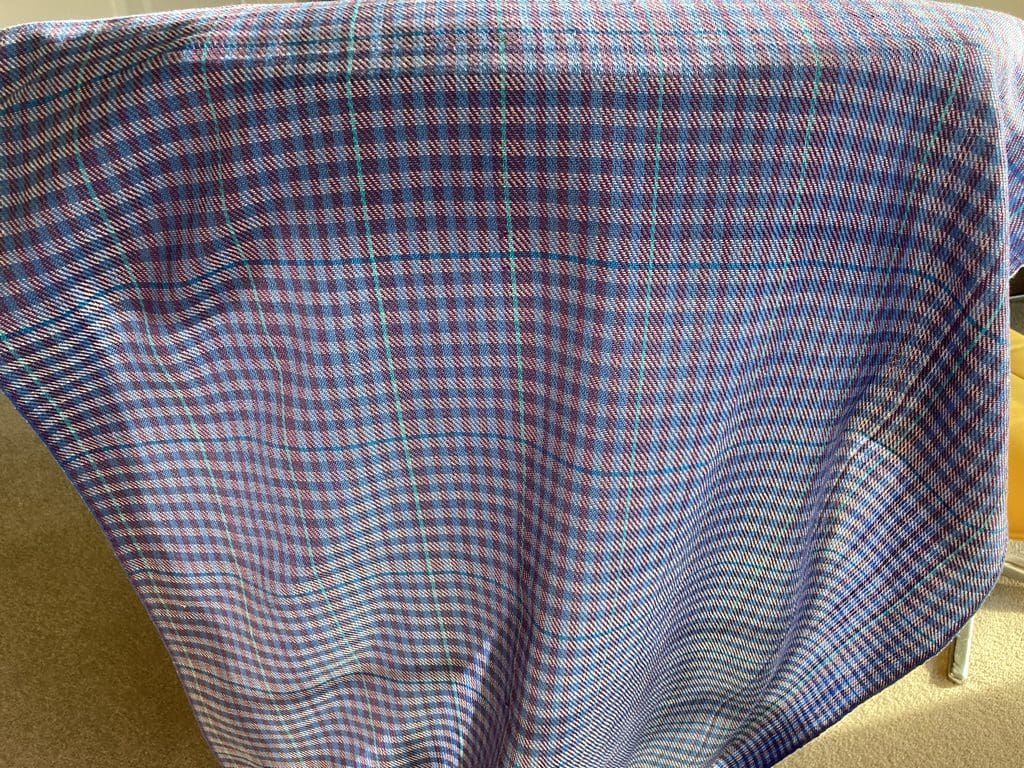
Snowdonia pattern built from a photo 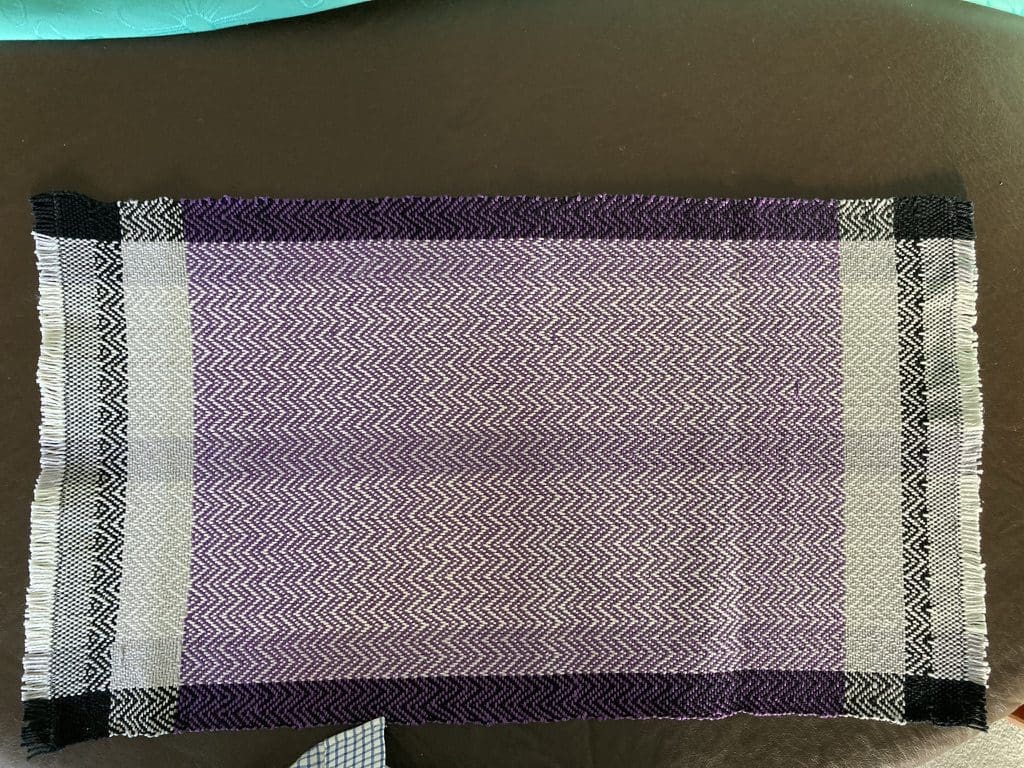
An easy pointed twill 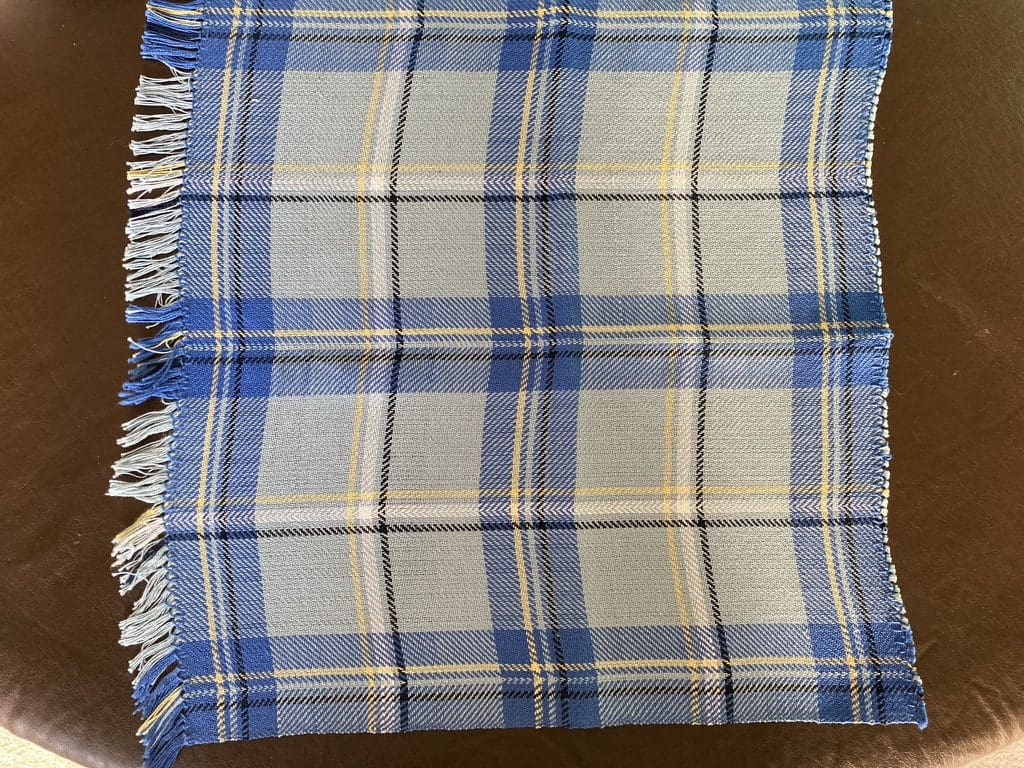
Llanddwyn pattern built from a photo 
Snowdonia pattern built from a photo
I’ve now begun a new piece – 6 table mats. I thought I would document the process.
- Decide on a project. Try to find something useful. With Helen’s help, we decided table mats – 6 of them. Probably in a cheap cotton – not very fine.
- Decide on a design. Either easy or something to learn from. I have some good basic pattern books and chose a complicated design called a ‘false damask’.
- Build the design. I have a good weaving design app – Bronze by Fiberworks. Design is based on three elements –
- how the warp will be threaded – onto which of the 8 shafts and what colours. (Warp is the structure that runs lengthwise through the cloth. Shafts are frames that rise and fall to make a shed through which the shuttle passes. Thread passes through eyelets in strings – called heddles – attached to the shafts.)
- how the weft will be woven and its colours (Weft are the threads that run across the cloth.) – called treading because many loom had foot pedals to raise and lower shafts. My loom does not have petals and the shafts have to raised and lowered by hand.
- which shafts are lifted for each shuttle shot – called tie-up because it connects the warp pattern with the weft pattern and gives the cloth its pattern
- Calculate width and length.
- Based on the design and the number of items, calculate the length of each ‘end‘ of the warp and total length of warp needed. This involves estimates of number of ends per centimetre of width (depends on size of thread and pattern), selvedge (you need one or two threads on each side to allow the cloth to close itself off properly at each edge), shrinkage after the weaving is off the warp and washed, any fringe and gap between items, loom waste (on my loom there is about 70cm that is needed just for the loom itself) and a contingency (add 10%). In this project, I need 300 warp ends and 1,554 metres of warp.
- Based on the design and distance being woven, calculate the number and length of each ‘shot‘ of weft and total length of weft needed. Involves estimates of ‘take-up’ as the weft goes over and under the warp, number of weft shots per centimetre (depends on size of thread and pattern) and shrinkage. In this project, I need 1,075 metres of weft.
- Based on above and design, calculate the lengths of each colour needed. This project has a just off-white for the warp and a different weft colour for each piece.
- Make certain you have all necessary thread before you begin.
- I have a spreadsheet to do all those calculations – which are non-trivial and I spend quite a lot of time on this step and the design step above.
- Wind the warp. I use a warping frame. Ashford youtube.
- Measure a piece of string to be exactly your calculated warp length. For this project it is 509 cm. Just over 5 metres.
- Fit that string onto the warping frame so it is a tight fit and will allow you to build threading cross and raddle cross (see next).
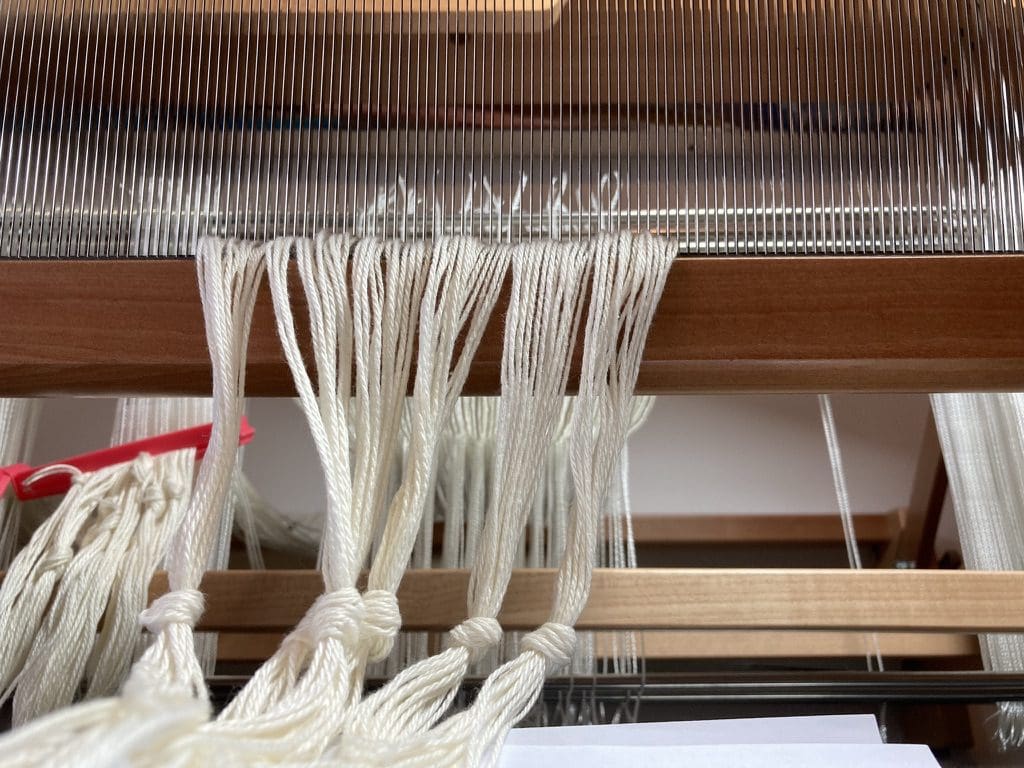
- Take you first colour and wind it to follow you template string. At the ‘start’ end you need to form a ‘threading cross‘ – where each tread crosses at an angle to the one below so each thread is separate and its order distinct. At the other end, group your threads in groups of 10 – the ‘raddle cross‘ – this will allow your warp to be properly arranged in the correct order across your loom.
- Add a tag to your first wind – at first peg and last peg. – then you will know where it began – especially important if you have a colour pattern.
- Any change of colour or when a ball of yarn runs out, must be either at the start or finish of that template.
- Keep going, changing colour and starting new balls of yarn. I can get 100 warp ends on the frame before it is unmanageable. Carefully your threading and raddle crosses and each end of the wound warp and take that winding off the frame – carefully keeping track of those marking tags and hang the raddle end from a door handle. For this project I had three windings each of 100 ends – each 5m long.
- Put your warp on the raddle. This keeps your warp in its correct order so it is properly across your loom. Ashford Youtube – first half.
- A raddle is a piece of wood with a nail sticking up every ½ inch.
- Because my project has 300 ends put into units of 10 at the raddle cross, I have 30 sets of 10 to go across the loom.
- Using the centre point of the raddle as your guide, count so you will get half on one side of centre and half on the other side. Keeping it evenly spread.
- Keep your raddle cross intact using ‘cross sticks’.
- Using that tag you put on in step 5d, put that first set of 10 ends into the right most raddle space as you are facing the front of the loom. This will make certain your first end is in the right most heddle on the loom.
- Proceed to your left dropping, in order, each set of 10 ends.
- Put your raddle on the loom’s back bar and wind your warp onto the back roller. Ashford Youtube – second half.
- Put your raddle on the back beam with the front of your warp through to near the front of the loom.
- Thread a back stick through the tail end of your warp ends – keeping everything in order. Attach that back stick to the back roller of the loom.
- While keeping tension on the front of the warp, wind it carefully onto the back roller until the front is about at the front of the loom and the threading cross (step 5c) is just behind the ‘heddles’ (next step). It is important to keep that threading cross intact to make threading easier – next step.
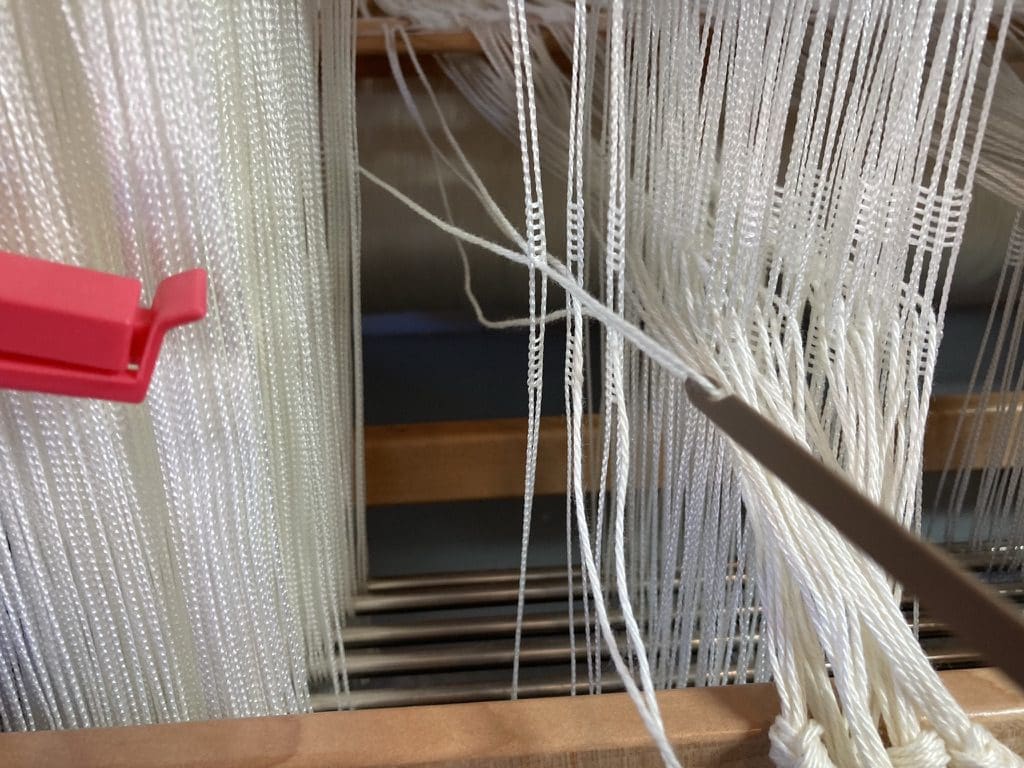
- Thread the heddles. Ashford Youtube.
- Sitting at the front of your loom, begin on your right hand side, you are going to select the next (right most) thread from the threading cross and thread it through the next heddle. The heddle is a piece of string that runs from the top bar to bottom bar of the shaft frame with an eyelet at its mid point. You have to get that thread through the eyelet using a special hook. For this project, there are 300 ends to thread. Might take a while.
- Keep the yet to be threaded bundle on the left of the set of heddles to thread. Pull the next thread from the threading cross. Pass it to the right side of those heddles and thread the next heddle on the next shaft.
- The heddle to thread will be the one that the pattern indicates is the next shaft to thread. Many patterns have a threading order where each shaft is threaded in order – 1,2,3,4,5,6,7,8 – or subsets of that.
- After you have done about 8 ends, check to make certain – you have the correct order of shafts, the thread goes through the eyelet, you have not skipped any shafts. You will be surprised how often one of those goes wrong. Doing small sections at a time will make less to redo. Also check you are at the correct place on the pattern. Tie off each set of checked ends in a loose knot.
- Don’t forget the two selvidge ends that do not pass through a heddle. They will not be moved up and down by the shafts but sit on the edge with the role of forming a self-edge.
- Check and check and check. This is important and it is very easy to make mistakes.
- Sley the Reed. The Reed is the metal comb-like device used to beat each weft shot into place. Reeds come in various ‘dents’ (slots) per inch. The reed I’m using has 4 dents per cm. You need to pull each end of the warp that you have threaded through those heddles.
- You need to work out how many ends will be passed through each dent. Divide the number of ends (this project has 300) by the number of dents in the on loom width of the piece (this project is 37cm wide at 4 dents per cm – ie 37 * 4 = 148). 300 ÷ 148 = 2. That is, I need to thread 2 ends through every reed dent.
- Check as you go to be certain not to miss dents. You will be surprised at how easy it is to miss a dent.
- Every 20 or so dents, have a thorough check and tie that set of ends off in a simple loop knot. Important, all those know have to be at the same distance from the reed. In the weaving process those knots will be used to tension the entire piece of weaving. Getting all the knots at the same length will give a even tension.
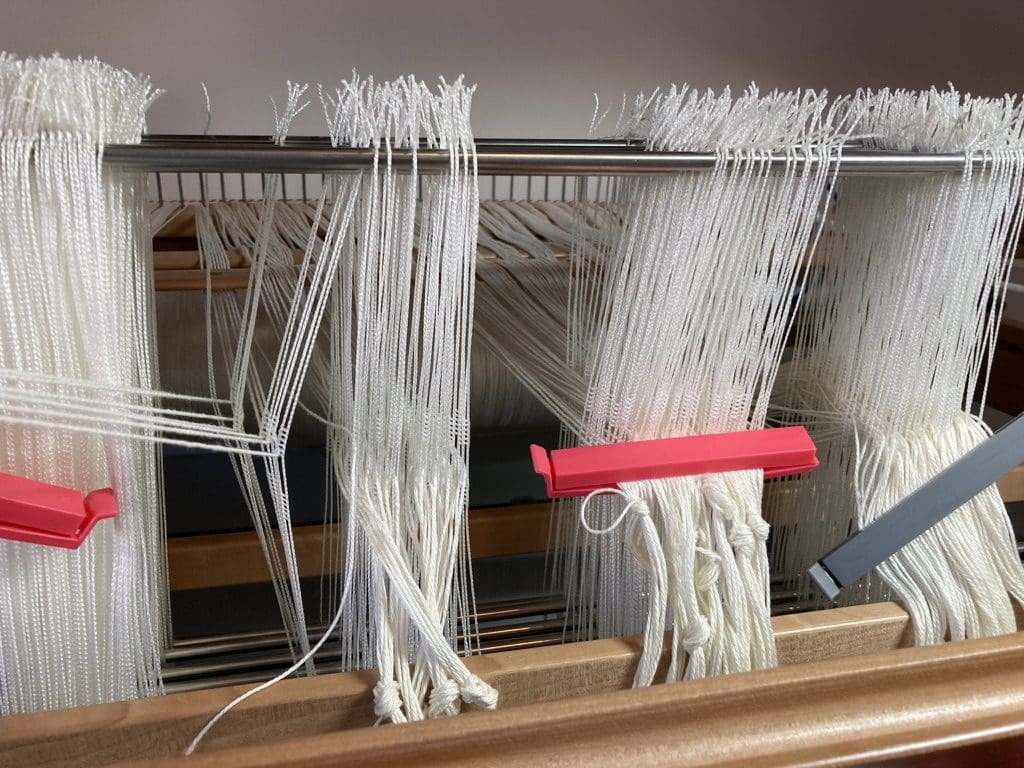
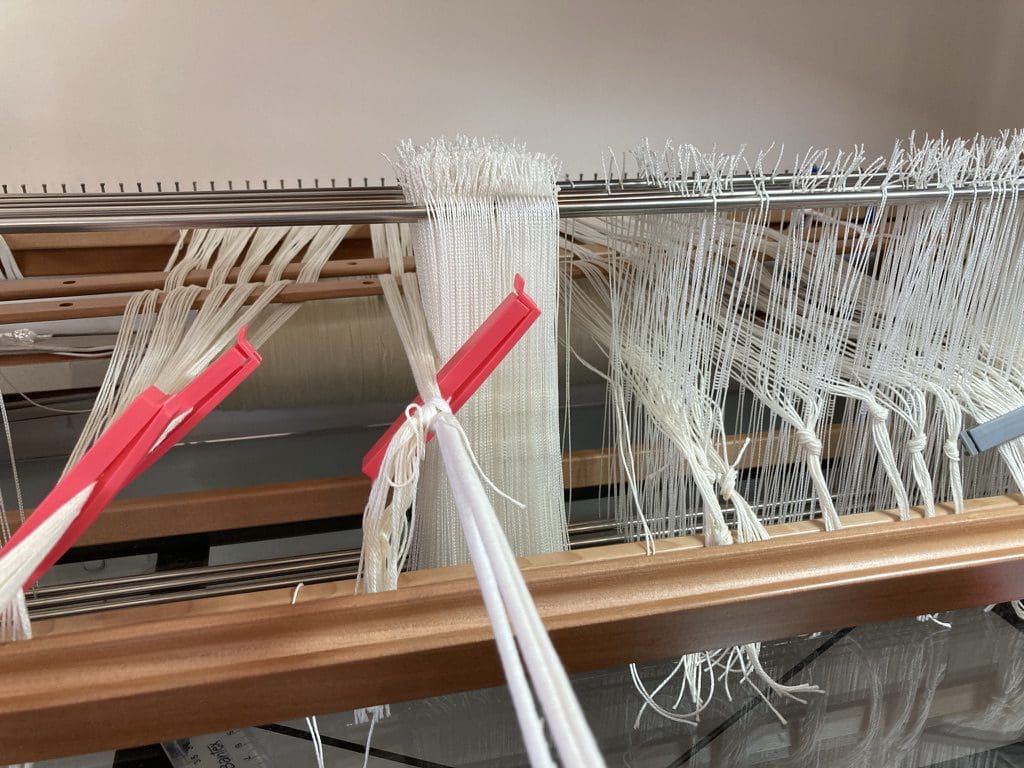
First 100 ends through Reed at 2 ends per dent 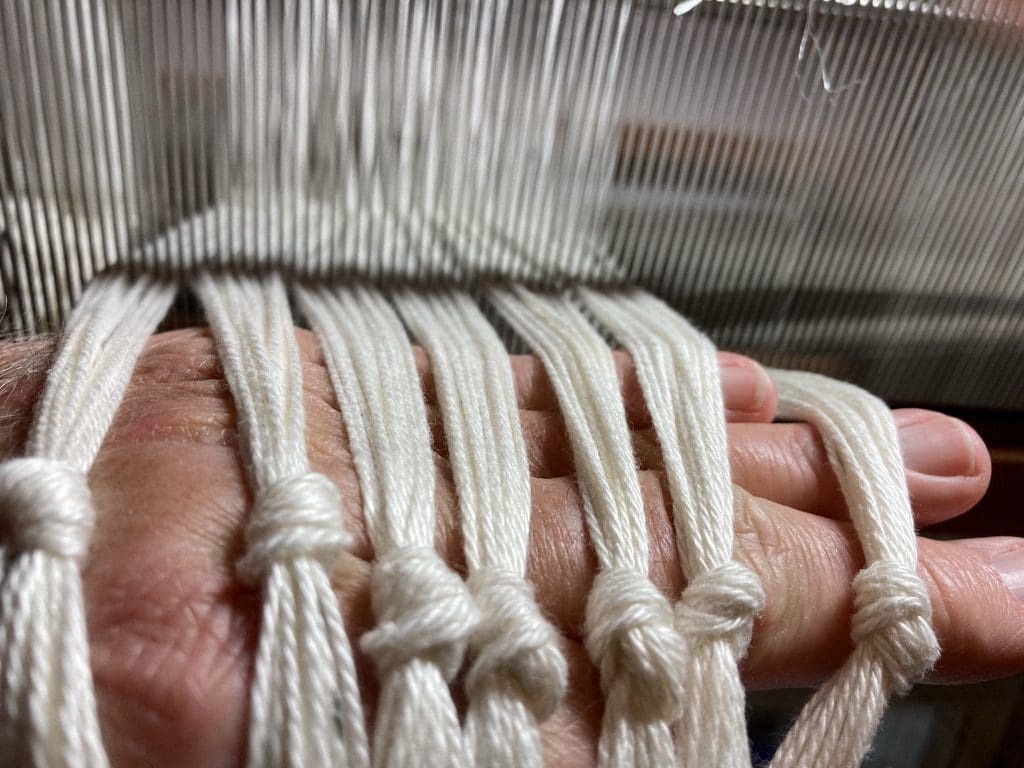
First 100+ ends through Reed at 2 ends per dent 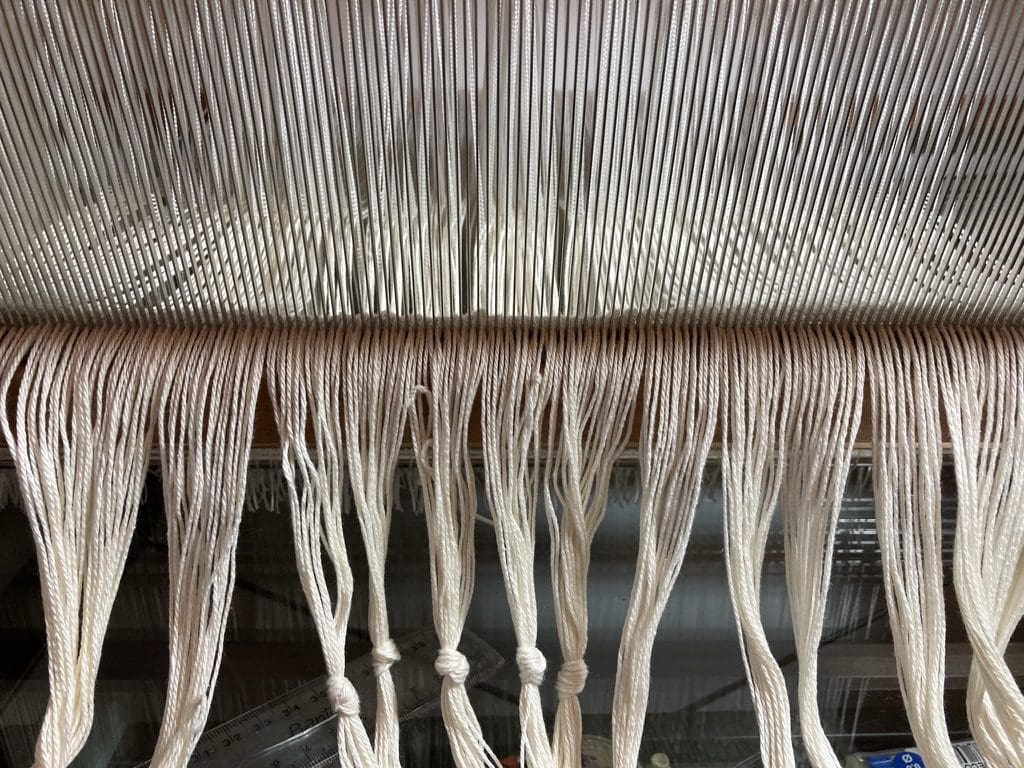
All 300 ends through the reed
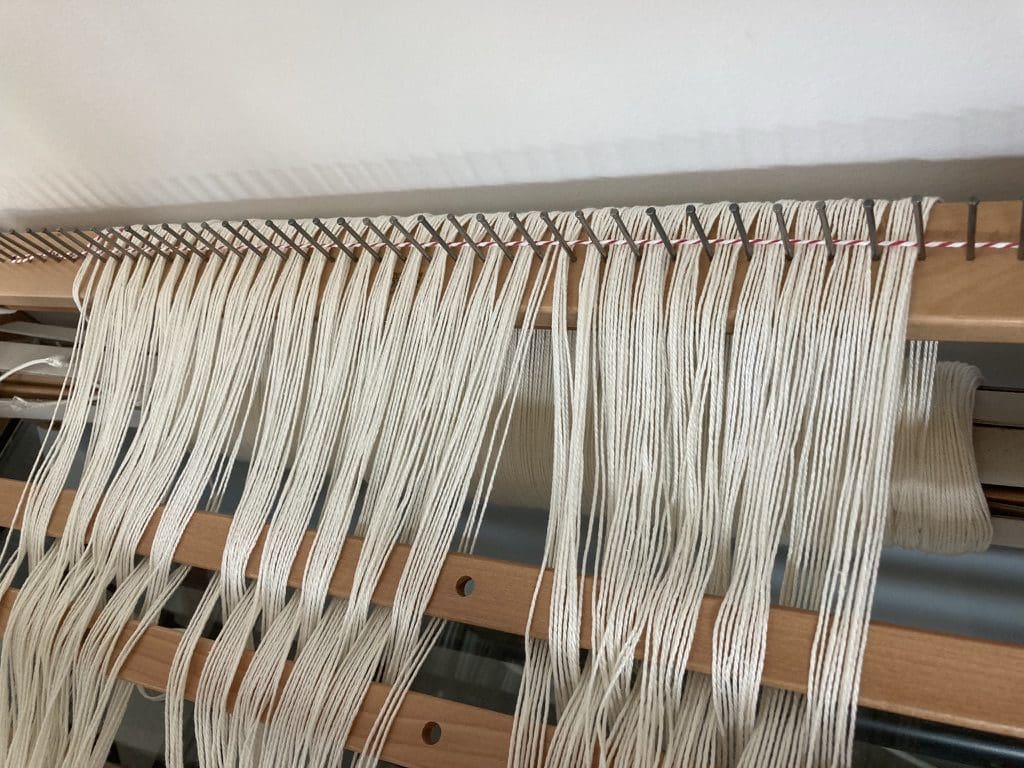
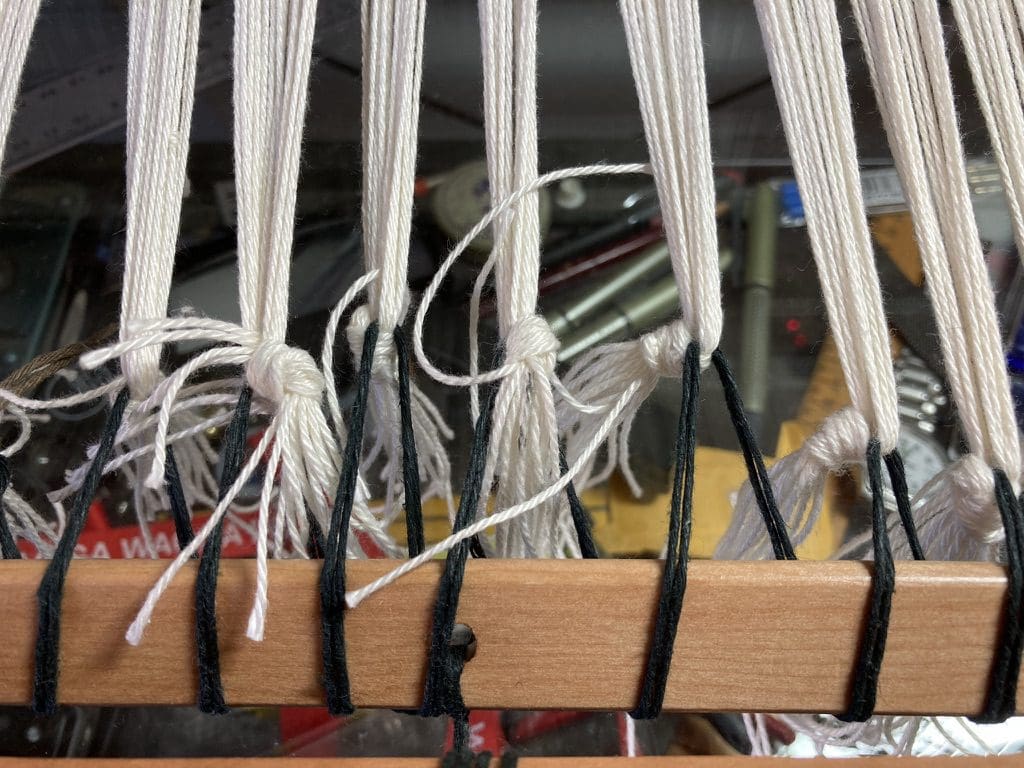
- Tie warp to front stick. This involves passing a strong string (I use hemp – which does not stretch) through each of those small bundles of ends to attach the warp to the front stick. Apply tension to the string and tighten as you go. This will give even tension the warp on the loom ready for weaving. Go across several times to increase tension evenly across the warp.
Warp tied to front stick and slightly tensioned 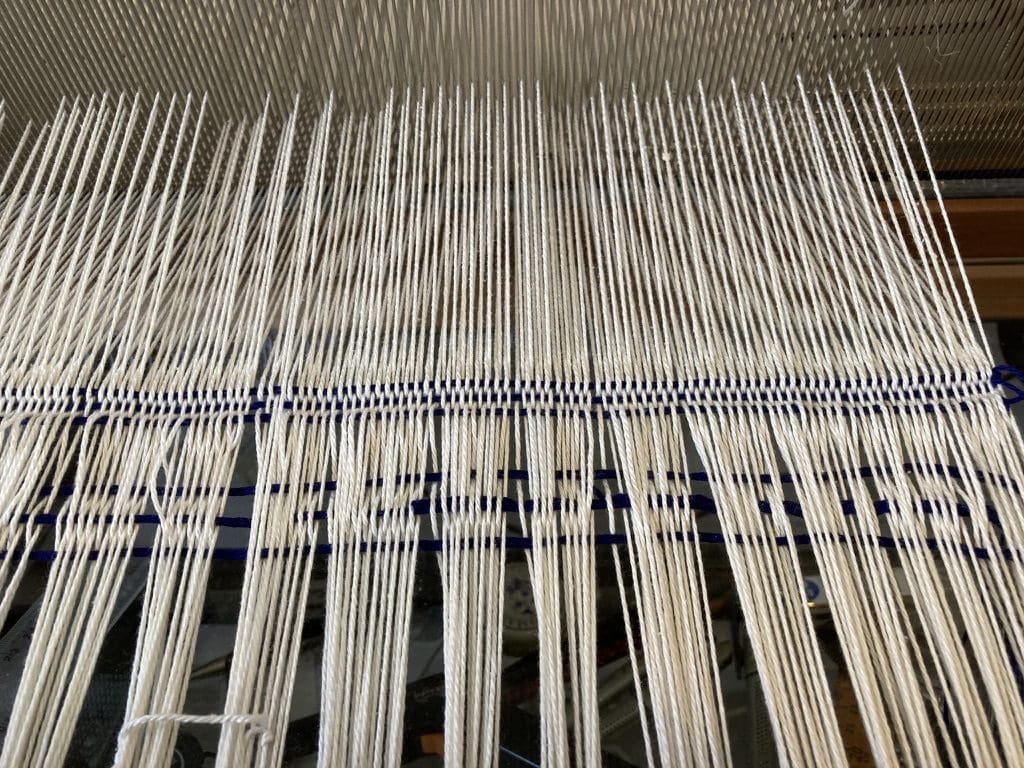
Tensioned and spread using a few rows of waste yarn 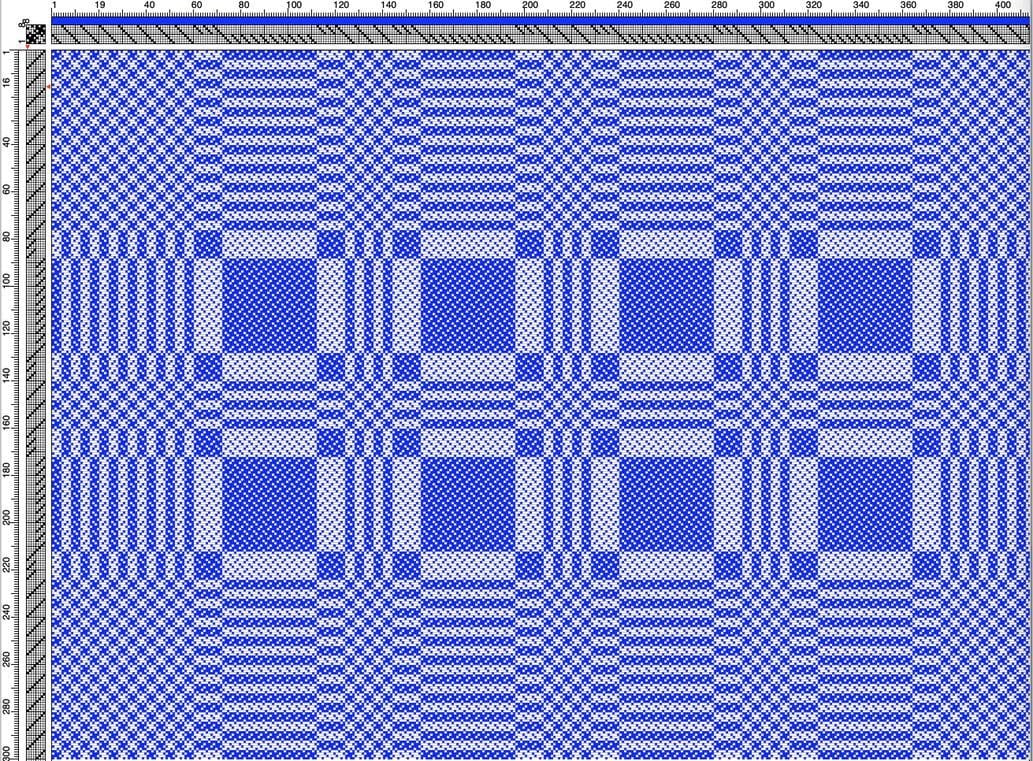
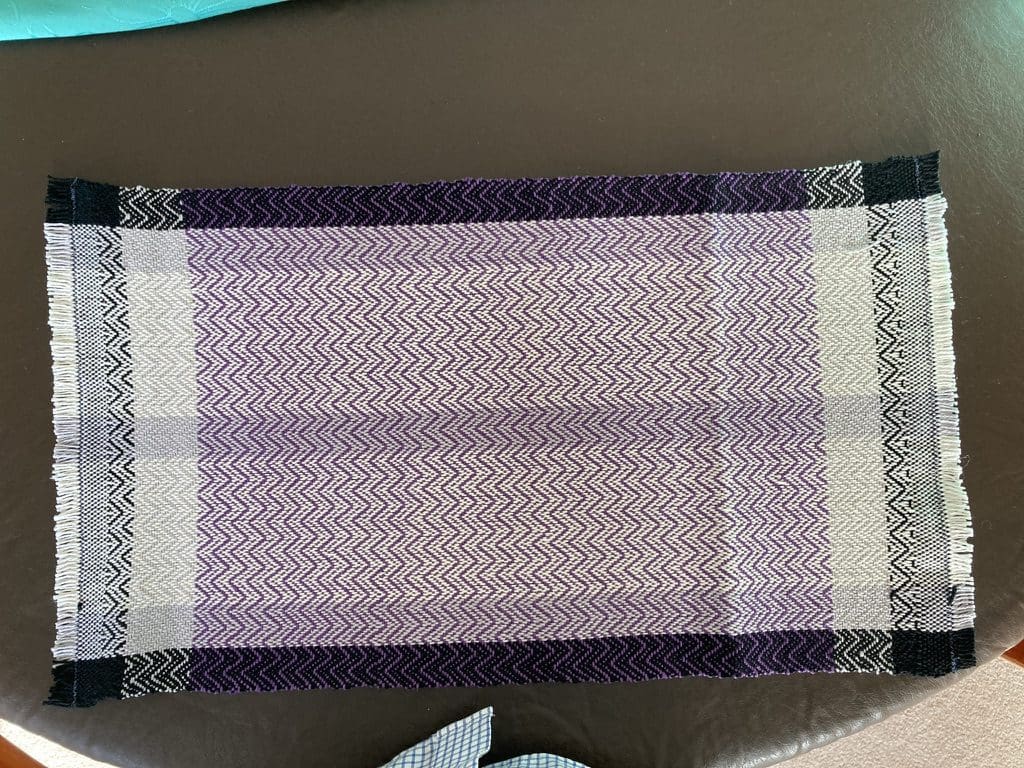
False Damask Table Mat 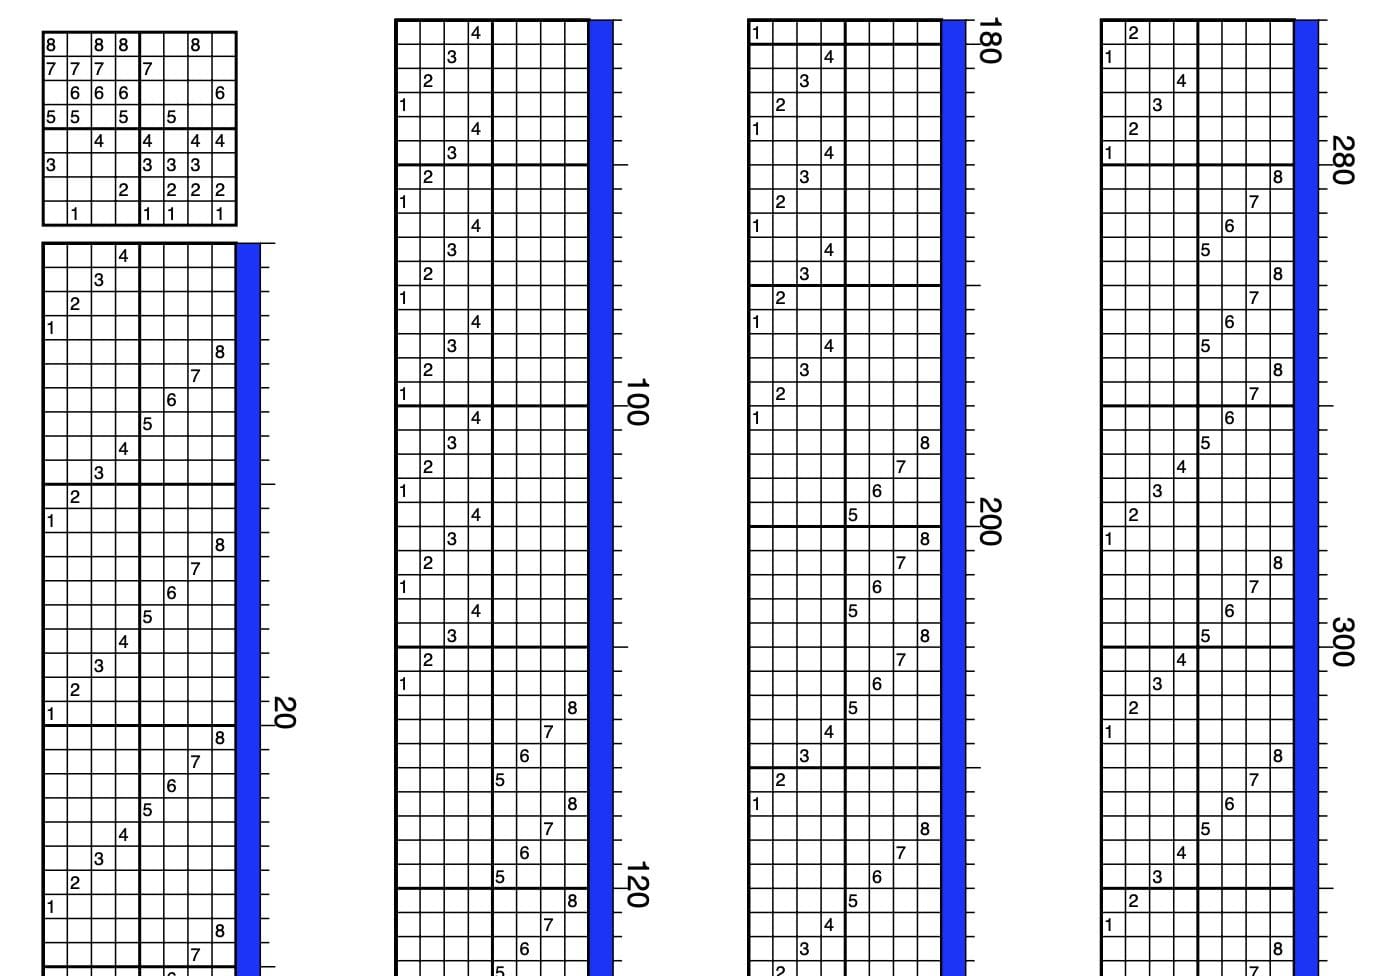
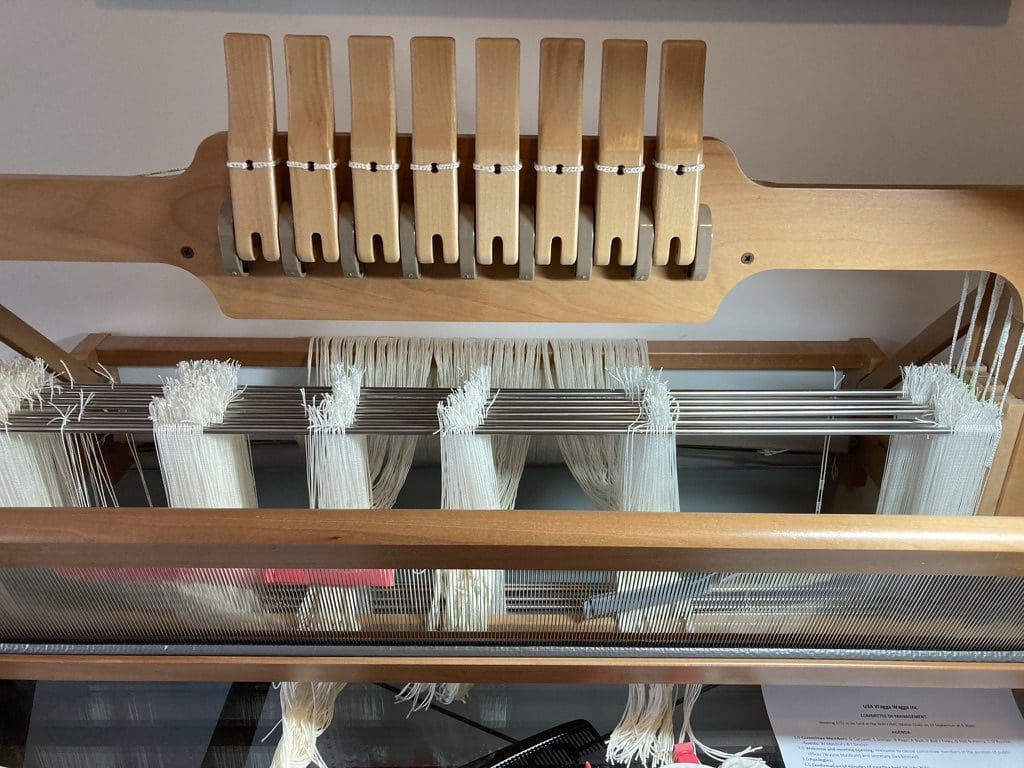
Tie-up and treading
- Make certain all warp and front stick tie goes over the front beam. I had an oops moments when I was about ⅔ of the way through the first piece of this project. I could not get the shed to form properly. After struggling along, I did a bit of searching and found that I had set up wrongly. So long since I’ve done this. The warp has to go over the front beam. I had it under.
- Weave. When I first began weaving, I mistakenly thought that this would be the main skill to learn and could not wait to get through that boring bit in steps 1 to 10. I now know that all of the above is part of weaving.
- First, we need to spread those ends out. Weave in a few rows of ‘tabby’ with scrap yarn. [Note. Tabby is the simplest, and most common, form of weaving pattern. Think handkerchiefs, tea towels, shirts. Also called the ‘King’ of patterns. Every second shaft is lifted, ie odd numbered shafts. The thread passed. Then even numbered shafts lifted and the odd ones lowered.]
- Now, we follow the pattern for the treading and tie-up. The first few rows of the treading and tie-up are shown in the pix above. The pattern indicates the first shot is with tie-up 4. Tie-up 4 says ‘lift shafts 3, 5, 7 & 8’. [Note: we lift the shafts indicated. Also, from the tie-up, this is a complicated block pattern. The pattern has the next shot as 3. Tie-up 3 has shafts 1,4,5,6 lifted. And so on for 436 rows.
- Beware of the selvidge. I’m using a floating single self-edge. It is not threaded through a heddle so does not rise and fall with the shafts. To have this self-edge work, go under the self-edge on the way in with the shuttle and over the self-edge on the other side on the way out.
- Also, beware that when you pass the shuttle through the ‘shed’ formed close to the reed by shafts being lifted and lowered, that you do not accidentally dive below any lowered ends or grab a few lifted ends. This is relatively easy when weaving tabby, is slightly harder for ‘the queen’ twill [where each weft end passes under several warp ends – common in tartans]. In this project, with its complicated tie-up, it is easy to miss the shed – which is not very wide.
- In this project, I’ve encountered a couple of problems that I have not seen before. First, I am using a cheap thread and it may be a bit thick for the pattern. Second, the pattern has to be woven with the weft dominant. [Usually, I can just pull the warp really tight and everything works for me. That method gives a warp dominant weave. And, with a tight warp and the cheap thread, I could not even beat the weft shot into place.] In this pattern, the weft must stand out as the feature. It took me a while to work that out and the first few rows look fairly ordinary. I’ve now loosened off the warp and the pattern looks ok. For a while I was having to have the warp tight to pass the shuttle through and then loosen right off to beat the weft shot. On Helen’s advice, I’ve found a sweet spot where I can get the shuttle through and can beat the weft. Still looks ok.
- Measure length woven for each piece as you go. You will need to know when to stop and how well the weft is going in. Mark with with tags every few cms. Record on tags: wefts completed, cm woven, wefts per cm.

I finished weaving the six table mats on 9 Oct 2021. What surprised me was that each colour of the Patons 4 ply cotton I was using gave a slightly different number of wefts per cm for this false damask pattern. Unlike my previous trill. patterns. Then began the next steps
- Cut the warp waste away from the just-finished end of the weaving. Measure it to check the amount of loom waste. (This waste was exactly 70 cm which was what I had in my weaving calculator.) Beware to stop last piece from unravelling. Needs to be done on conjunction with next step.
- Add a knotted fringe to ends of each piece. Best achieved with spacing material and scrap wool still in place to prevent unravelling.